EMQX Primer
I’ve been meaning to move my MQTT broker to my Home Assistant machine, and while doing that I started experimenting with a new broker, EMQX. Below is a short introduction and HOWTO where I reproduce my older Mosquitto setup.
My old setup was managed by Ansible, running on a SBC in my home network. Most of it is centered around Home Assistant so I installed EMQX as an addon in Home Assistant and started experimenting.
Table of Contents
why, though?
I was just curious! Also, I’ve found the builtin web ui to be pretty decent to use – but the best feature is probably the builtin diagnostics tools.
The log trace was really helpful when troubleshooting ACLs, and having a builtin client is also really handy. I can do both of these using the standard Mosquitto tooling, though.

Access control
Authentication (“who is it?”) and authorization (“what are they allowed to do?”) are optional with EMQX (!) but it is highly recommended to setup this before doing anything more.
Authentication
- On the web ui, go to Access Control → Authentication
- Create a backend, for this I’ve used “Password-based” with “Built-in Database” to avoid external dependencies. I went with the defaults for all options.
- Now you can create traditional users (with passwords)
Authorization
- On the web ui go to Access Control → Authorization
- Create a backend, I’ve used “File” and all defaults.
- Now you can setup ACL rules for your users and topics!
Deny by default
One thing to notice here is that the default ACL is setup to permit anyone access to any topic! At the end of the ACL (found under Access Control → Authorization → Backend → Settings) you can find this comment:
%% NOTE! when deploy in production:
%% - Change the last rule to `{deny, all}.`
%% - Set config `authorization.no_match = deny`
In my case I’m running this as a Home Assistant addon, so I don’t have (easy) access to the configuration file – luckily we can inject configuration as environment variables!
In Home Assistant → Settings → Addons → EMQX → Settings → env_vars:
- name: EMQX_AUTHORIZATION__NO_MATCH
  value: deny
Restart the addon to apply.
ACLs
The ACLs for the file backend are done as Erlang tuples, which at first glance looks complicated but isn’t (just don’t miss the period at the end of each expression!).
%% Default ACL entries
{allow, {username, {re, "^dashboard$"}}, subscribe, ["$SYS/#"]}.

{allow, {ipaddr, "127.0.0.1"}, all, ["$SYS/#", "#"]}.

{deny, all, subscribe, ["$SYS/#", {eq, "#"}, {eq, "+/#"}]}.

%%%% My custom ACLs below

%% homeassistant is allowed read-only access to a few topics
{allow, {username, {re, "^homeassistant$"}}, subscribe,
 ["owntracks/#", "rtl_433/#", "cheerlightsRGB/#"]}.

%% You can use and/or conditions like so
{allow, {'or', [{username, {re, "^zigbee2mqtt$"}},
                {username, {re, "^homeassistant$"}}]},
 all, ["home/#", "homeassistant/#", "zigbee2mqtt/#"]}.

%% homeassistant is allowed read/write to a tasmota topics in addition to
%% zigbee2mqtt/# and homeassistant/#
{allow, {username, {re, "^homeassistant$"}}, all,
 ["tele/#", "cmnd/#", "stat/#", "tasmota/discovery/#"]}.

%% Regexp to allow tasmota devices (each with their own username) to
%% read/write on their own topics, based of their usernames
{allow, {username, {re, "^tasmota_"}}, all,
 ["tele/${username}/#", "cmnd/${username}/#", "stat/${username}/#",
  "tasmota/discovery/#"]}.

%%%% default, deny anything else
{deny, all}.
More information in the documentation.
Bridge setup
Setting up bridges in EMQX is slightly more involved than in Mosquitto, but in return does offers more flexibility in the action stage. You essentially need to setup a Connector to the other broker, and then a republishing rule.
In the example below I’m setting up a MQTT bridge from mqtt.cheerlights.com
to my local broker for the top level topic cheerlightRGB.
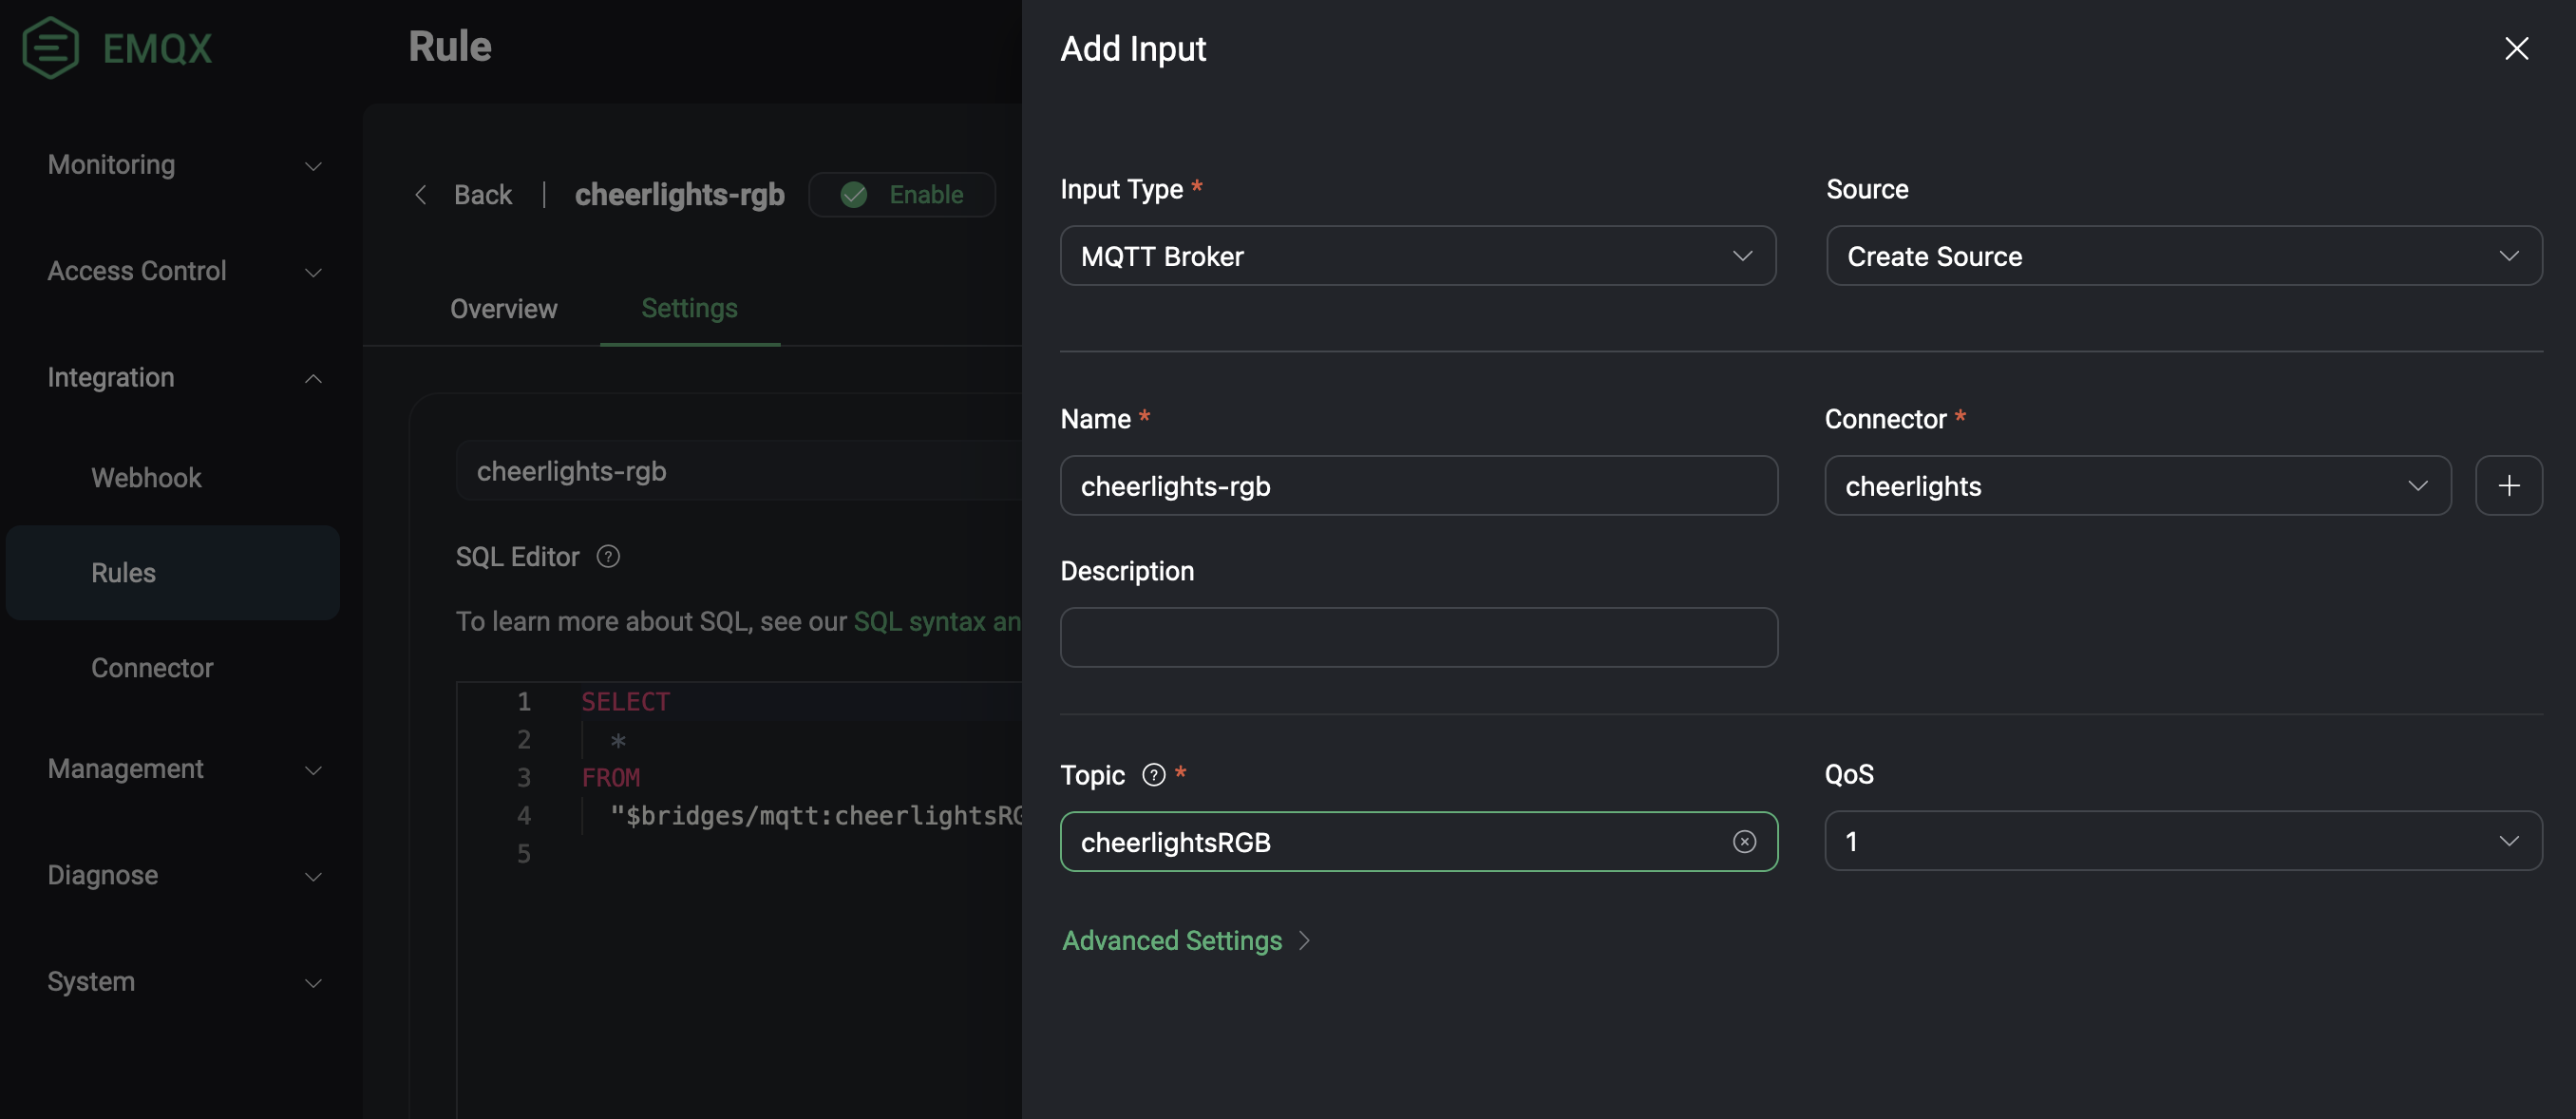
Setup Integration → Connector (I’ve used MQTTv5 due to reasons)

Create rule with connector as data input, remove the default placeholder.

The SQL should look something like this:
SELECT
  payload
FROM
  "$bridges/mqtt:cheerlightsRGB"
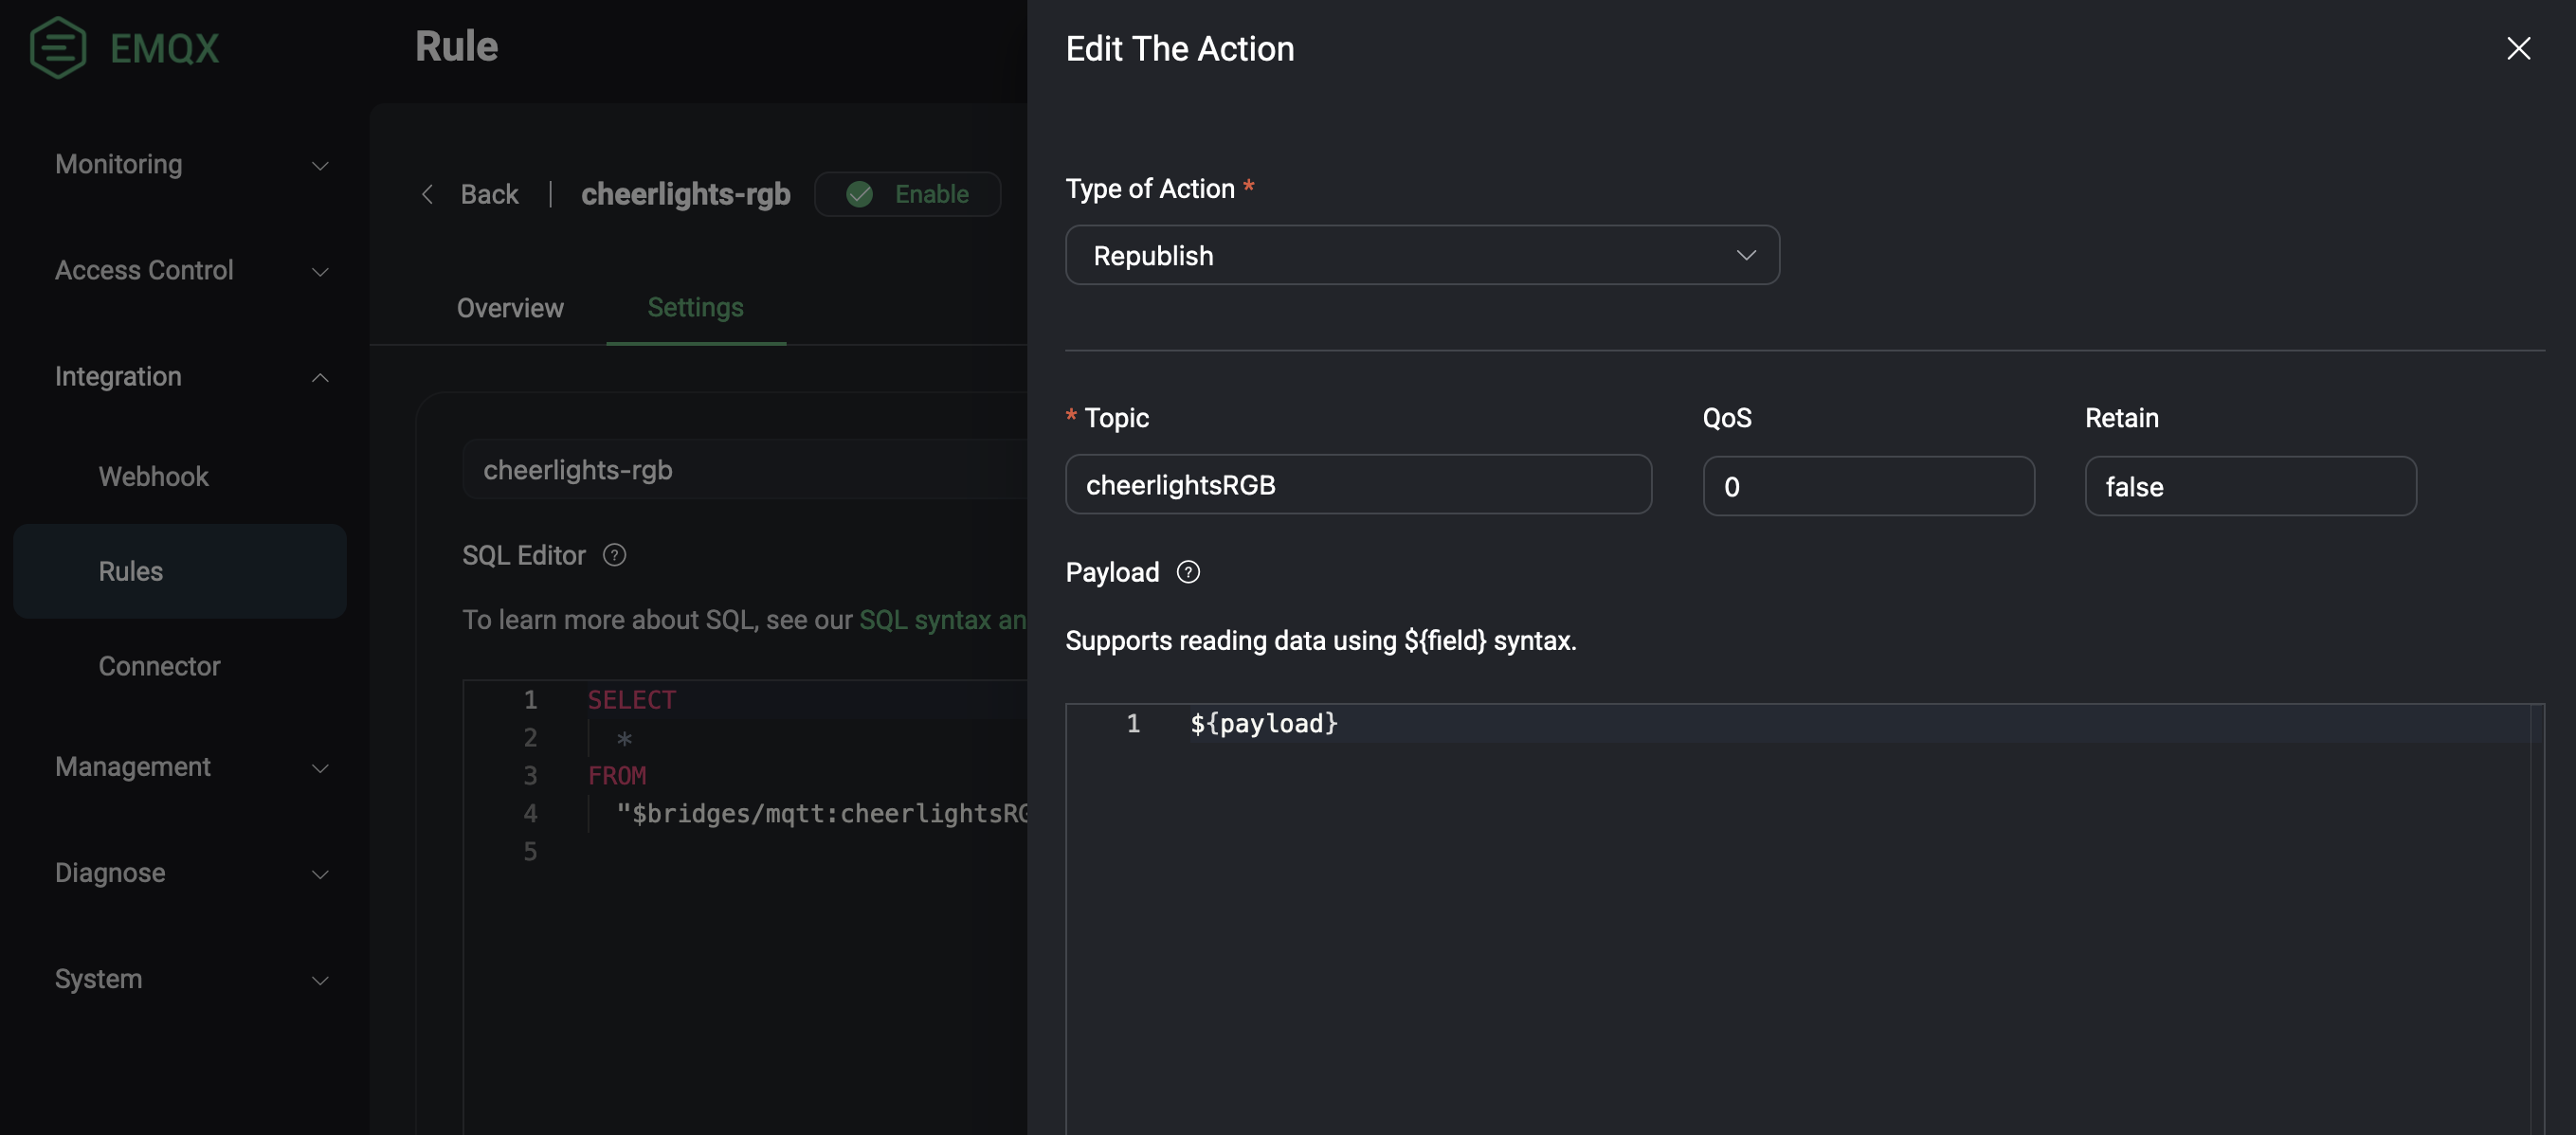
Create an Action Output of type Republish. Topic is where the received message will be republished on your local broker, and for payload you can just insert
${payload}to just republish the content as-is. Here’s a link to the documentation.
After this is setup, any messages published at mqtt.cheerlights.com on topic
cheerlightsRGB will be republished on our broker, as-is, on the same topic.